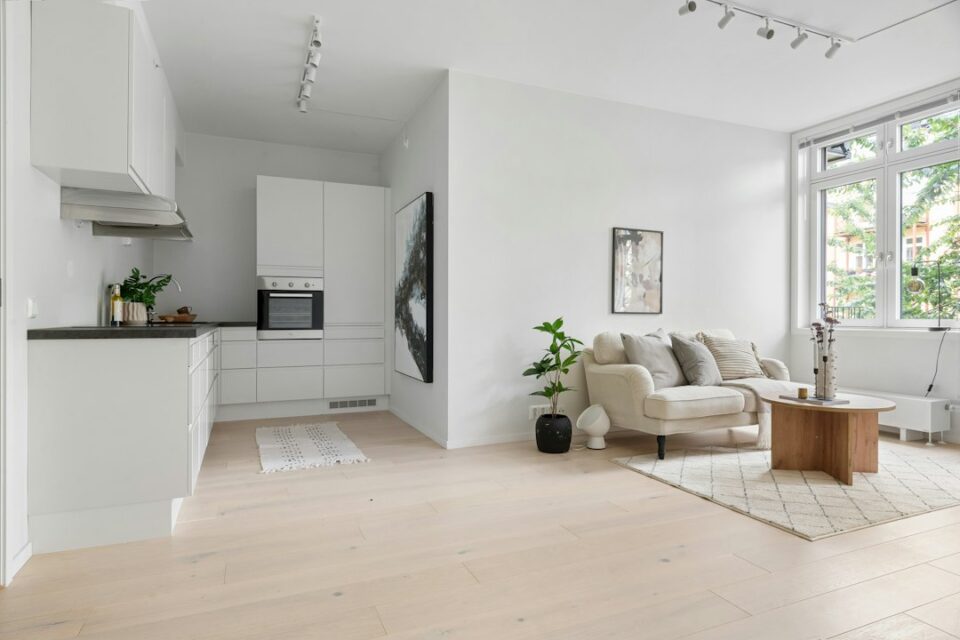
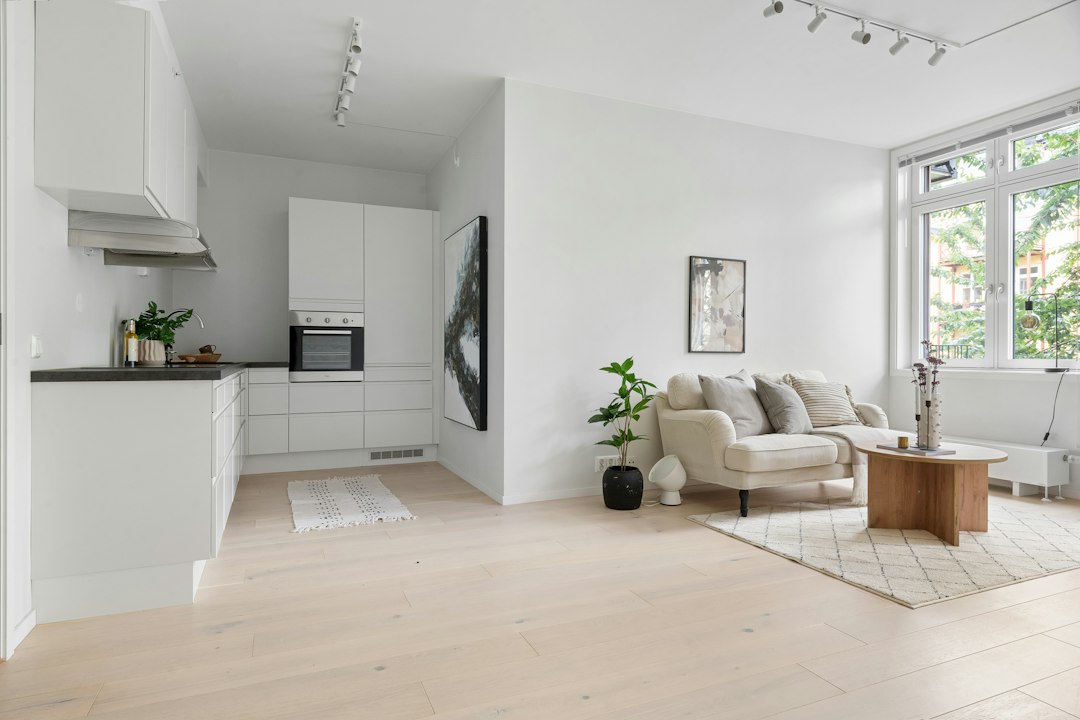
If you’re searching for very small open plan kitchen living room ideas, here’s the short plan that actually works: use zoning without walls with a slim peninsula or a floating sofa as the divider, keep one continuous floor and a tight, light palette, hold 36–40 in walkways, allow a 12 in counter overhang for stools, favor compact 24 in appliances, and choose a quiet 250–400 CFM hood. Pair those with multi-functional, movable furniture and you’ll have a layout that feels larger, runs smoothly, and cleans up fast.
Day to day, the goal is clean flow and fewer visual breaks. Keep tall storage to the room’s edges, put the most-used prep counter near the sink, and let lighting and rugs mark zones instead of walls. If you entertain occasionally, plan for flexible seating with stackable or folding pieces; if you cook often, prioritize ventilation, wipeable surfaces, and a simple traffic loop that doesn’t cut through your hot zone at the range. Those are the essentials; below you’ll find the layouts, measurements, and budget moves to get it right the first time.
Very Small Open Plan Kitchen Living Room Ideas That Work Now
When space is tight, decisions are won or lost in inches. These three tiny-layout patterns cover most apartments and small homes. Pick the one that matches your room shape and doorway locations.
Three quick layouts
- One-wall + peninsula ledge: Best when you have one long wall (9–12 ft clear) and want casual dining. Use a 15–18 in deep shallow base or steel console on casters as a ledge; target a 24–48 in seating span with a 12 in overhang for two stools. Keep 36–40 in clear behind stools for passage.
- Galley + floating sofa divider: Works in long, narrow rooms. Put two 21–24 in deep runs 6–7 ft apart. Float the sofa so its back aligns with the end of the galley, leaving a 36 in lane. A slim console behind the sofa adds storage and doubles as a charging perch.
- L-shape + rolling island: For more square rooms. Build a 24 in deep short leg and a 30 in deep long leg if you can, then park a 24×36 or 24×48 in rolling cart parallel to the long leg. Roll it away when guests arrive.
Measurements cheat sheet (bookmark this)
- Main walkways between zones: 36–40 in (don’t dip below 34 in).
- Counter overhang for stools: 12 in (10 in minimum if knees are tight).
- Stool width allowance: 24–30 in per person (center-to-center); leave 6–8 in between seats if not using arms.
- Clearance behind a seated stool: 36 in to pass; 44–48 in for a “pull-through” aisle.
- Sofa to coffee table: 16–18 in for reach, 30–36 in for a pass-through lane.
- TV viewing distance: about 1.5–2.5× screen height (not diagonal). A 25 in tall screen is comfortable at ~3–5 ft.
- Appliance sizes that fit: 18–24 in dishwasher, 24 in range or 24–30 in induction hob, counter-depth or 24–27 in under-counter fridge.
- Vent hood target: quiet 250–400 CFM with good capture area; clean filters often.
Budget and time at a glance
- Under $200, one weekend: One large rug to anchor the lounge, a runner to hint at the kitchen lane, plug-in pendants or clamp lamps for task light, peel-and-stick backsplash or film on the peninsula face, cable raceways to tidy sightlines.
- $500–$1,500, weekend to two weeks: Build a slim peninsula with bracketed overhang, add a wall-mount TV and conduit, swap a tall cabinet for to-ceiling pantry storage with pull-outs, upgrade to a quiet hood and better under-cabinet task lighting.
- $3,000+ mini-reno: Re-cabinet uppers to the ceiling, integrate or panel small appliances, replace mismatched flooring with one continuous surface, add a narrow rolling island with power grommet.
Rental-friendly swaps
- Peel-and-stick finishes for backsplashes, appliance panels, and low-traffic wall sections.
- Plug-in, swagged pendants over the peninsula; a floor arc lamp to “pendant” the lounge without hardwiring.
- Freestanding pantry cabinet (deep narrow wardrobe) for bulk storage.
- Castered island cart you can tuck under the window or against a wall.
- Tension-mounted shelves or poles for vertical storage without drilling.
Use the quick chooser below to match a layout to your room and budget.
| Room shape | Minimum room size (W × L) | Best kitchen layout | Divider option | Seating capacity | Clearances to keep (aisle, overhang) | Estimated budget band | DIY or Pro | Pros | Cons |
|---|---|---|---|---|---|---|---|---|---|
| Long and narrow | 8–10 ft × 15–20 ft | Galley, 21–24 in runs | Floating sofa + slim console | 2–3 stools, 2–4 lounge seats | 36–40 in aisles; 12 in overhang | $200–$1,500 | Mostly DIY | Strong traffic lane, simple to zone | Limited island options; tall storage goes to ends |
| Square | 10×10–12×12 ft | L-shape | Rolling island or open shelf | 2–4 stools, 3–5 lounge seats | 36 in around cart; 12 in overhang | $500–$3,000+ | DIY to Pro | Flexible seating, easy to reconfigure | Watch island size; can feel busy if over-furnished |
| Studio/odd-shaped | Varies; target 9–11 ft clear wall | One-wall + peninsula ledge | Back-of-sofa divider or open shelf | 2 stools, 2–3 lounge seats | 36 in behind stools; 12 in overhang | $200–$1,500 | DIY | Lightest footprint, good sightlines | Less closed storage; rely on vertical solutions |
Measure, Zone, Flow: A 30‑Minute Planning Method for Tiny Open Plans
Grab a tape, notepad, and painter’s tape. In half an hour you can sketch a layout that avoids the most common mistakes.
- Map fixed points first: Measure the wall that hosts plumbing (sink), the swing of doors, locations of windows and radiators, and any immovable columns. Sketch them on grid paper or a phone app. Mark outlets you plan to use for the hood, fridge, and TV.
- Draw the zones: Label four blocks: cook, prep, dine, lounge. In a tiny plan, prep and dine often overlap at a peninsula or rolling cart, and the lounge can double as a guest sleep zone with a sleeper or daybed.
- Apply flow rules: Keep aisles at 36–40 in. Avoid back-to-back doors/drawers across an aisle. Put a drop zone by the entry (hooks, tray, basket) so bags don’t land on your prep counter.
- Zone without walls: Hang a pendant or track over the peninsula, drop a large rug under the lounge with at least the front sofa legs on it, use dimmable lamps at the sofa corner, and consider a low open shelf (under 42 in tall) as a divider you can see over.
- Sightline strategy: Keep the centerline of the room under 42 in in height. Put tall storage and the fridge at the far ends or corners so the middle stays visually open. Choose glass-front or open shelving only if you’re tidy; otherwise panel doors keep the eye calm.
As you sketch, place your highest-use trio in a short triangle: fridge–sink–hob. In tiny kitchens the runs are short, so it’s more about adjacency than perfect triangle geometry. If you’re fighting a long room, aim to line the sofa back with the end of the kitchen run so the lounge feels intentional, not like leftover space.
For more on small-room flow and visual tricks, this guide complements the steps above: Maximize Small Spaces with Tips for Space Planning + Organization.
Layouts by Room Shape: Narrow, Square, and Studio
Long and narrow (8–10 ft wide)
Use a one-wall or galley kitchen paired with a centered sofa. If plumbing is on the long wall, a one-wall run with a 15–18 in deep ledge opposite gives you bite-sized dining and landing space. If you have two walls, run a 21–24 in deep galley. Place the sink on the brighter side, the hob on the side with simpler ducting, and the fridge at an end so doors don’t block the aisle.
Center the sofa on the living half, facing the TV wall or a window. Leave a 36 in walkway behind the sofa to the bedroom or balcony if that’s the traffic path. If there’s no through-traffic, push the sofa back to reclaim 6–10 in for a wider coffee table or a slender armchair.
Best for: Solo cooks, two-person households, people who value direct circulation. Pros: Straightforward storage and lighting, easy to keep clean. Cons: Minimal island options; seating is mostly in-line at a bar.
Square (10×10–12×12 ft)
An L-shape keeps appliances clustered while freeing a side for a slim 24×48 in island cart or fixed 18–24 in deep peninsula. Stools face the living area so conversations flow. A round coffee table prevents bruised shins and eases circulation.
Set the TV on a wall-mount with a shallow floating shelf below for devices, not a deep console. This opens floor area and makes the room feel calm. Use a large 6×9 ft rug in most 10×12 spaces so front sofa legs and at least one chair sit on it; small rugs chop the room and make it look smaller.
Best for: A small family that wants a real seat-at-the-counter moment. Pros: Flexible seating, island-on-wheels option, good for entertaining. Cons: It’s easy to oversize the island; keep clearances honest or you’ll hate it the first time two people try to pass.
L-shaped/studio (odd angles, door-heavy)
When doors, angled walls, or radiators steal your corners, compress the kitchen into a clean galley, then divide the living zone with the back of a sofa and a console table. A folding wall table or drop-leaf that docks behind the sofa becomes dinner-for-two when opened, and a work perch during the day.
Open shelving as a divider can work if it’s low and styled simply. Keep the center shelf for bowls and plants, and store messier items behind doors at either end. If you need extra pantry, consider a wardrobe-style cabinet with 15–18 in interior depth and pull-out bins.
Best for: Renters and anyone who wants maximum flexibility. Pros: The light flows, the space shows larger. Cons: You rely more on vertical storage and disciplined editing.
If you’re weighing sofa sizes for the divider approach, this primer will help you choose a compact, supportive model that looks intentional from the back: Choosing the Right Sofa for Your Living Room.
Tiny‑Kitchen Upgrades That Pull Their Weight
Storage that adds capacity without bulk
- To‑ceiling cabinets with a 12–15 in deep top run for infrequent items; keep everyday dishes between shoulder and eye height.
- 12–15 in deep open shelves for spice rails and mugs where you won’t bump your head; line them up with cabinet bottoms for a tidy horizon.
- Corner carousels or diagonal corner cabinets if you have an L; otherwise keep corners dead and push drawers into straight runs where they work better.
- Pull‑outs: 6–12 in spice/pantry pull‑outs catch small items that clutter counters.
- Toe‑kick drawers reclaim 3–4 in of height for baking sheets and boards.
Appliances sized for small plans
- 18–24 in dishwasher, preferably panel‑ready to keep the run visually quiet.
- 24 in range or a 24–30 in induction hob with a compact built‑in oven below.
- Counter‑depth 24–27 in under‑counter fridge plus a small, well‑sealed freezer drawer, or a narrow 24–28 in full‑height refrigerator if you batch cook.
Ventilation that actually helps
- A quiet 250–400 CFM hood with a broad capture area does more in a tiny plan than a loud high‑CFM unit that you avoid using. Duct outside when possible; if you must recirculate, choose high‑quality charcoal filters and replace them on schedule.
- Crack a window or use a trickle vent while cooking to supply make‑up air. Wipe the backsplash and nearby walls weekly to keep odors from lingering.
Lighting layers
- Bright task light at the counter: slim under‑cabinet LED bars (3000–3500 K) with even diffusion.
- Pendants or a single low‑glare linear above the peninsula set at ~28–34 in above counter.
- Dimmable ambient light in the lounge: two or three lamps on a plug‑in dimmer create instant zones.
For more kitchen efficiency ideas that dovetail with small layouts, browse 7 Simple Kitchen Hacks for Effortless Cooking.
Living Area Hacks and Multi‑Functional Furniture
Divide with the sofa by floating it so the back lines up with the kitchen’s edge. Add a narrow 10–12 in deep console behind it for silverware, napkins, chargers, and a couple of stools that tuck under. That console becomes your buffet on pizza night and your laptop desk by day.
Mount the TV on the wall to clear floor space. Hide cables in paintable raceways. A shallow 6–8 in floating shelf corrals the streaming box and remotes and looks cleaner than a deep media unit.
Light, movable pieces are your friends. Choose stackable stools, nesting side tables, and slipper chairs over bulky sectionals. A drop‑leaf or extendable table turns a 24 in deep console into a 48 in dining table in seconds. Storage ottomans double as seating and stash throws or game controllers.
Rugs that do the zoning: One large rug anchors the lounge; set at least the front sofa legs and two chair legs on it. Add a hard‑working runner in front of the sink/hob, not a tiny mat, to visually extend the kitchen lane.
If your living zone still feels cramped, these visually enlarging moves help: keep furniture legs visible (no skirts), pick open‑base pieces, and match wood tones to the floor so they read as one plane. For a broader set of tricks, see Small Living Room Ideas: How to Make a Compact Space Feel Larger.
Cohesion That Makes Small Look Big
The rule is simple: fewer, larger moves beat many small ones. Limit the space to two or three main finishes and repeat them across both zones so the eye reads continuity rather than change.
- Flooring: One continuous surface from kitchen to lounge is the biggest visual upgrade you can make. If you need a wet‑area threshold, use the same tone and a flush transition strip.
- Palette: Keep a light, neutral base for walls and large pieces, then repeat one accent color in textiles or stools. The repetition is what makes it feel designed, not the specific hue.
- Metals and woods: Match or intentionally contrast hardware and lighting metals in both zones. Repeat the same wood tone on shelves and table legs.
- Mirrors: Place one across from a window or behind the sofa to double light and extend sightlines. Keep frames slim to avoid clutter.
- Cabinet panels: Panel or integrate appliances where possible so the kitchen reads like furniture, not a wall of machines.
Layer light to support the palette: warm‑neutral 3000–3500 K for task, slightly warmer in the lounge for evenings. If you want a deeper dive on selecting fixtures and output, bookmark our lighting primer: Choosing the Perfect Lighting.
Budget, Timeline, and Trade‑Offs (Who This Is and Isn’t For)
Quick wins (1 weekend, under $200)
- Re‑arrange furniture to float the sofa and create a 36 in lane.
- Lay one large lounge rug and a kitchen runner for instant zoning.
- Add plug‑in under‑cabinet lights and a swagged pendant to define the bar.
- Use peel‑and‑stick film on a peninsula face or backsplash for cohesion.
- Corral cables and remotes; mount the TV to open floor space.
Mid upgrades ($500–$1,500)
- Build a slim peninsula with a 12 in overhang and two stools.
- Swap one upper cabinet run for open shelves with a matched metal finish across zones.
- Install a quiet 250–400 CFM hood and set a filter cleaning schedule.
- Add a wardrobe‑style pantry with pull‑outs to free counter space.
- Replace mismatched lighting with a coordinated set on dimmers.
Mini‑reno ($3k+)
- Take uppers to the ceiling and add a crisp light rail for shadow‑free counters.
- Panel the dishwasher and fridge for a furniture‑like kitchen wall.
- Refloor for one continuous surface; refit thresholds flush where possible.
- Order a 24×48 in powered rolling island with concealed outlets.
Trade‑offs and honest fit
An open plan this compact may not suit everyone. If you deep‑fry or cook pungent dishes often, you’ll spend more time on odor control. Mitigate with a better hood, make‑up air (open a window while cooking), lidded trash, and washable slipcovers. If you’re noise sensitive, consider soft furnishings (thicker rug pad, curtains) and door seals on bedrooms to damp sound from the living zone. Pet owners might prioritize wipeable flat‑front cabinets and a robot vacuum dock under the peninsula ledge.
Families who spread homework across the coffee table can make it work with a folding table that docks behind the sofa or a table‑height console. If you routinely seat four for dinner, a drop‑leaf table plus two stackable chairs stored in a closet keeps options open without crowding everyday life.
Answers to Common Questions
How do you separate a small open‑plan kitchen and living room without walls? Use low, open dividers that don’t kill sightlines: a floating sofa with a 10–12 in console behind it, a slim peninsula or breakfast ledge with a 12 in overhang, a low open shelf under 42 in high, plus layered lighting and rugs to signal zones. Keep finishes continuous so the dividers feel like furniture, not barriers.
Can you fit an island in a very small open plan, and what size works? Often yes, if it’s a cart or narrow fixed piece. A 24×36 or 24×48 in rolling island fits many 10–12 ft wide rooms if you maintain 36 in clear all around. If that clearance isn’t possible, switch to a 15–18 in deep peninsula ledge anchored to a wall.
How should you arrange furniture in a long, narrow open‑concept space? Align the sofa back with the end of the kitchen run, center a rug and coffee table in front, and leave a 36 in lane behind the sofa if it’s a thoroughfare. Put tall storage at the ends, not the middle, and wall‑mount the TV with a shallow shelf to free floor area.
How do you reduce cooking smells and noise in an open plan living room? Use a quiet 250–400 CFM hood and run it at low speed for longer. Open a window for make‑up air. Choose induction to cut airborne grease. Soft furnishings, rugs with pads, and curtains lower echo so conversations travel less.
What color palette makes a small open plan feel bigger? Light, low‑contrast palettes expand the sense of space. Keep to two or three main finishes, repeat wood and metal tones across zones, and add one accent color in textiles or stools. Continuous flooring and matching baseboard profiles do as much as paint to enlarge the feel.
Pull these threads together and your inches will work like feet. Start with the measurements, choose the right divider, and stay disciplined with finishes. Your tiny open plan will reward you with easy mornings and calm evenings.